This article explains how you can send Data Notifications from Excel using ipushpull. You can use ipushpull to send data-driven notifications from Excel to email, SMS and chat apps like Slack, MS Teams and Symphony.
...
| Info |
|---|
The Excel add-in is only supported on Microsoft Windows Desktop Excel |
1. Sign up for ipushpull and install our Excel add-in
First, make sure you have signed up to ipushpull and installed our Excel add-in. Note that the add-in currently only supports Microsoft Windows Excel. For help installing it see Data Source - Installing the Excel Add-in.
...
2. Login Log in to ipushpull and open the ipushpull Demo Sheet
...
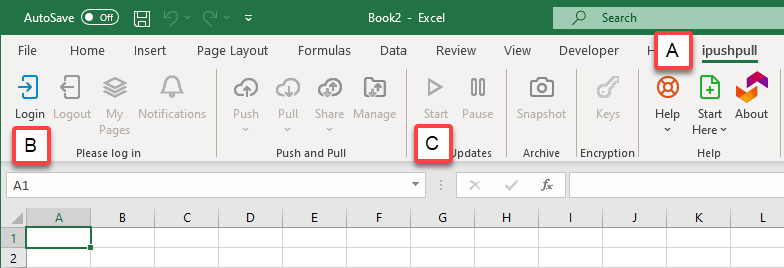
Start Excel, select the ipushpull tab (1A) on the Excel ribbon then Login (2B)
Press the Start button (C) to enable pushing and pulling from your sheetPress
To open our demo sheet, select Excel as Data Source from the Start Here button to open the ipushpull demo spreadsheet. menu:
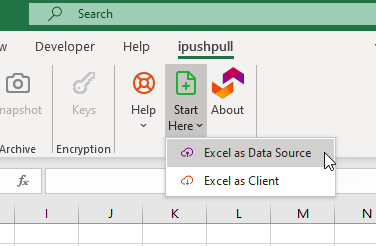
Click the 5. Notifications tab to view see the notifications demoexample:
...
3. Link the spreadsheet to your Notifications Page
...
Enter your Notifications Page Name into the cell coloured orange (J13).
Enter your Folder Name into the cell coloured yellow(J14).
...
Enter a Notification Name into the cell coloured purple (I7). This can be anything you like - it’s for your own reference and is useful when managing multiple notifications.
Enter one or more Notification Destinations (separated by commas) into the cell coloured blue (L7). You can view or create your Destinations in the ipushpull app here.
Enter the message you want to send into the cell coloured green (M7). This can also be anything you like.
...
The value in the cell coloured red (K7) is used to trigger your notification. When it changes from FALSE to TRUE the message you entered in M7 will be sent to the Destinations you entered in L7.
...