The Excel add-in is only supported on Microsoft Windows Desktop Excel |
1. Sign up for ipushpull and install our Excel add-in
First, make sure you or your account admin have signed up to ipushpull and installed our Excel add-in. For help installing it see Data Source - Installing the Excel Add-in.
2. Log in to ipushpull and open the ipushpull Demo Sheet
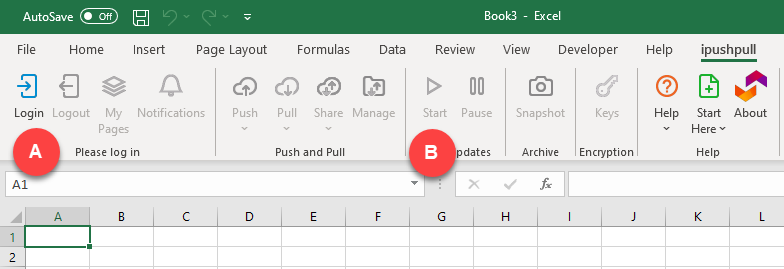
Start Excel, select the ipushpull tab on the Excel ribbon then Login (A)
Press the Start button (B) to enable pushing and pulling from your sheet
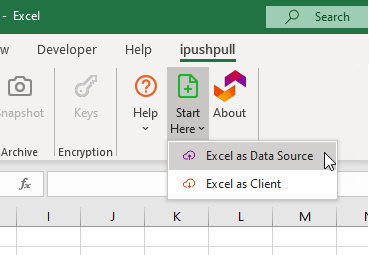
To open our demo sheet, select Excel as Data Source from the Start Here menu:
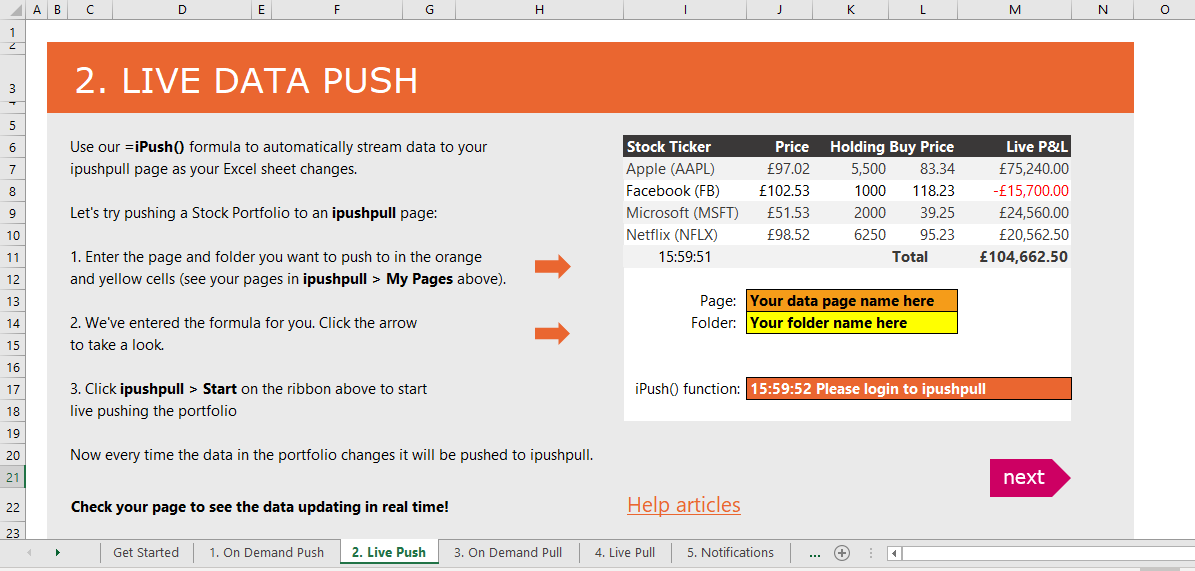
Click the 2. Live Push tab to see the push example:
3. Link the spreadsheet to your Data Page
You send data from your Excel sheet using the iPush() function. This function sends the values, styles and formatting for the Excel range you’ve selected to ipushpull each time your data updates. It can then be viewed in any of our client apps.
We’ve already added a sample iPush() function into cell J17 in the Live Push demo sheet. Next you’ll configure it by entering your Folder and Page name. If you don’t know your Folder and Page Name, you can find them in the ipushpull app here.
Enter your Data Page Name into the cell coloured orange (J13).
Enter your Folder Name into the cell coloured yellow (J14).
Once you have entered your folder and page names correctly the iPush() function will return a success message:
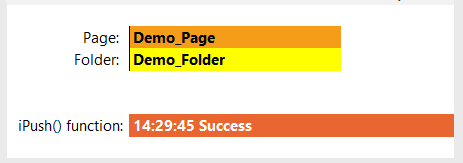
If you don’t see the Success message, check out our troubleshooting section below.
If you do see the Success message, you can now view your data in the ipushpull web app or any of our other client apps.
4. Troubleshooting iPush() Error messages
Some common error messages and how to solve them:
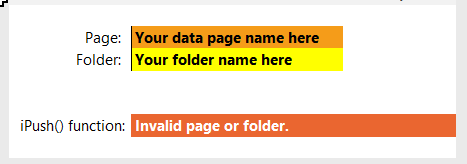
Invalid page or folder
Check:
the folder and page exists
you have spelled your folder and page name correctly
you have access to the pages - select My Pages | Refresh Pages from the Excel ribbon if the page has just been created or you have just been granted access to it
Paused - Press Start to continue
Updates are paused. Press the Start button on the Excel ribbon to enable pushing from the sheet.
Please login to ipushpull
You are not logged in. Click the Login button on the Excel ribbon to login.
User not authorized for page
You only have read access to the page and are not permitted to update it. Ask your folder admin to give you write access.
Next Step:


